2K Molding with Laser Texture: A Mold Engineer’s Design Guide
A two-shot housing already tells a story: two materials or two colors, bonded in one cycle, no assembly. Add a laser-etched texture next to a glossy area and the part starts to look like a premium consumer product instead of a molded box.
That combination is not hard to get right, but it is easy to get wrong. Most problems we see are decided at the CAD stage, long before steel is cut. This guide covers what we, as 2K mold makers in Xiamen, check when a customer asks for two-shot molding plus laser texture.
Why laser texture instead of chemical etch?
Traditional mold texturing (often specified as VDI 3400 or Mold-Tech style patterns) uses masking and acid to etch the cavity steel. It is proven, economical for large uniform areas, and still the right answer for many parts.
Laser texturing removes steel layer by layer with a pulsed laser driven from a digital pattern. For 2K tools it has some practical advantages:
- Sharp, repeatable geometry. Geometric patterns, logos, gradients and crisp borders are reproduced from a file, not from hand-applied masking.
- Precise boundaries. The texture can stop right at a gloss window or a parting edge. That matters when the texture sits next to a 2K interface line.
- Depth control. Depth can be varied by region, so a pattern can fade toward an edge or stay shallow on low-draft walls.
- 3D surfaces. The pattern can be mapped over curved cavity surfaces without the stretching you sometimes get with film masks.
- Easier rework and matching. Because the pattern is digital, a second cavity or a replacement insert can be textured to the same file.
Trade-offs: laser texturing usually costs more per area than chemical etch, and very large flat areas with a standard grain are often better served by chemical etch. Many tools use both. Choose per surface, not per part.
How texture interacts with the 2K shutoff and interface
In two-shot molding the first shot sits in the second-shot cavity, and the steel must seal against that first-shot part to stop the second material from flashing over. This shutoff is the most sensitive area of any 2K tool, and texture changes it.
Key rules we follow:
- Keep texture off the shutoff land. The sealing surface should be polished or fine-machined steel. A textured shutoff leaves micro-gaps where the second shot can creep.
- Leave a clean margin. Stop the texture a small distance before the interface line so the boundary is controlled by steel geometry, not by the texture edge. The exact margin depends on material and pattern depth; we confirm it in DFM.
- Texture on the first shot affects bonding. If the second material overmolds a textured first-shot surface, the texture can help mechanical keying, but it can also trap air. Venting and material pairing need to be checked.
- Decide which shot carries the texture. It is often cleaner to texture the cavity of the shot that forms the visible outer skin and keep the interface surfaces simple.
Draft angles for textured surfaces
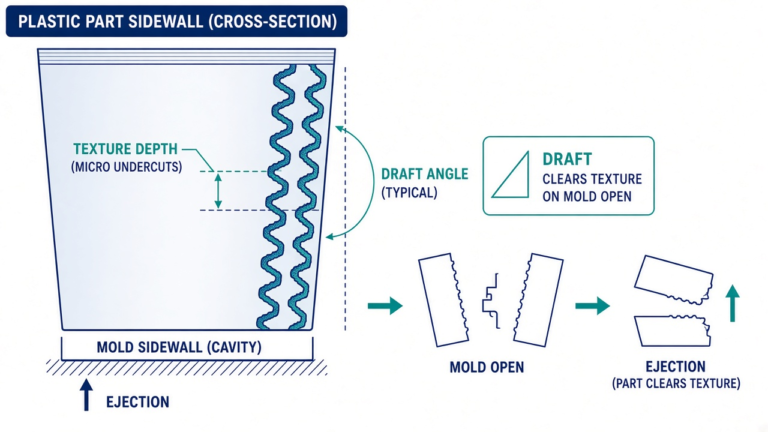
Texture is essentially thousands of tiny undercuts. Without enough draft, the part drags on ejection, scuffs the pattern, or shows bright “drag marks”.
General guidance:
- Add extra draft on textured walls beyond what a polished wall needs. A common rule of thumb is roughly 1° extra per 0.025 mm (0.001 in) of texture depth, but always confirm with the texture supplier’s chart for the specific pattern.
- Fine, shallow laser patterns tolerate less draft than deep, coarse grains. This is one of the reasons laser texture is useful on walls where draft is limited.
- Watch the second-shot side: soft TPE overmolds are more forgiving on ejection, while rigid PC or PC/ABS second shots behave like any rigid textured part.
- Where draft simply cannot be increased, discuss reducing depth locally rather than accepting drag marks.
Designing gloss and texture contrast
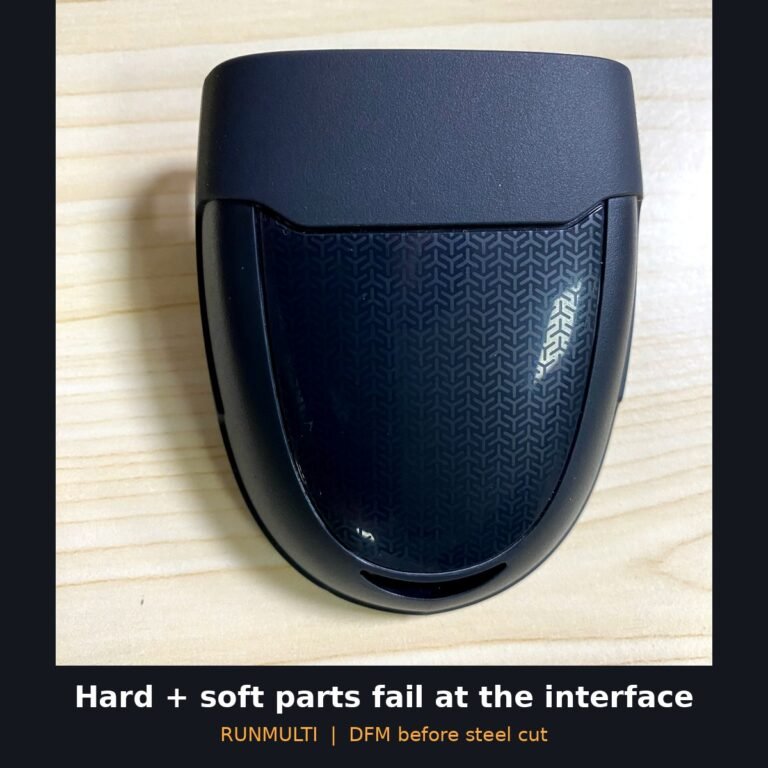
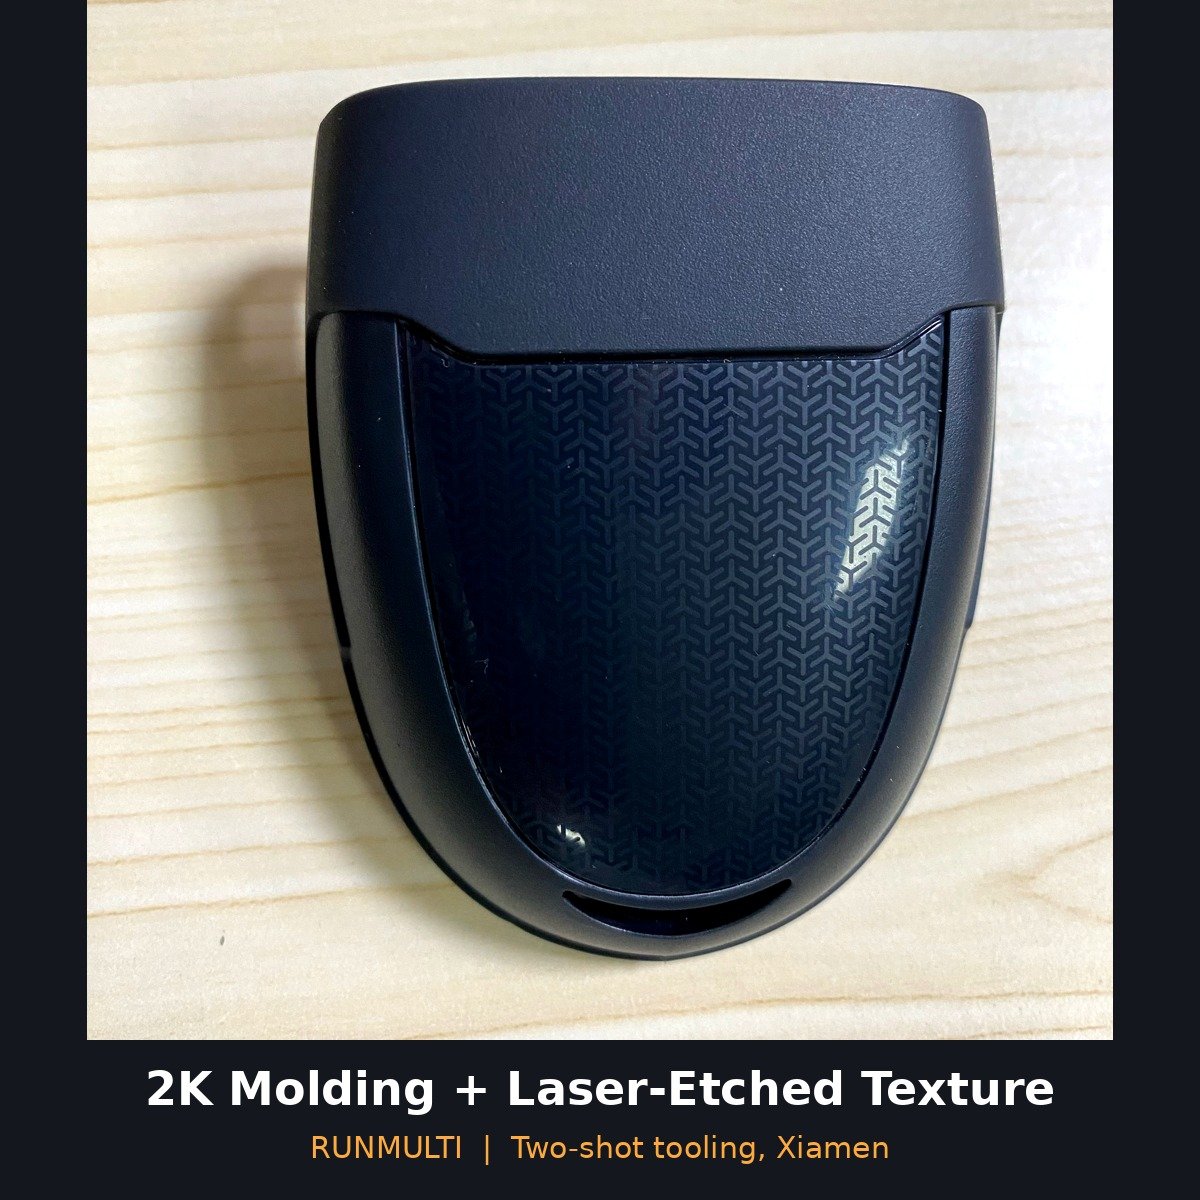
The look of the example part in our photo, a dark gray 2K housing with a glossy window carrying a laser-etched geometric pattern, comes from contrast: polished steel next to textured steel, and one material next to another.
To get clean contrast:
- Polish first, texture second. The gloss areas are polished to the required finish (e.g. SPI A or B grades), then the laser pattern is applied. Re-polishing after texturing risks rounding the pattern edges.
- Choose resin for the finish. Gloss reproduction depends on material, mold temperature and fill. Amorphous resins such as PC, PMMA or ABS usually reproduce gloss and fine detail better than many semi-crystalline materials.
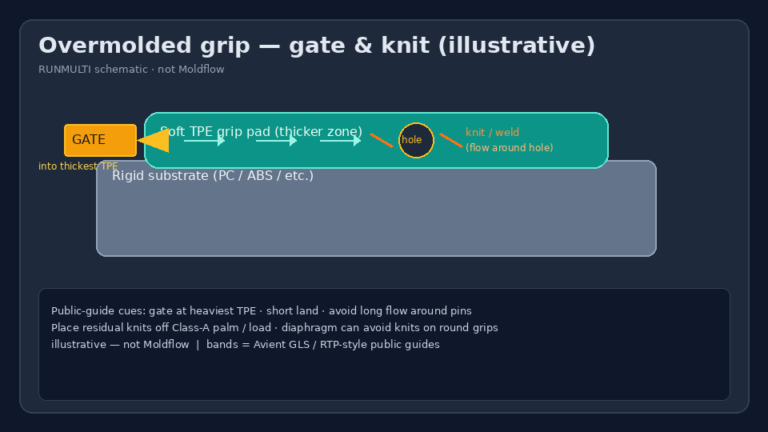
- Dark colors show everything. Black and dark gray make flow lines, sink and gloss variation more visible. Plan gate location and wall thickness with this in mind.
- Consider gloss level on the texture itself. Laser texture can be given a lower or higher gloss character by pattern and post-treatment; agree on a reference sample.
Design tips for 2K parts with laser texture
- Keep wall thickness as uniform as practical behind textured and glossy areas to avoid sink and gloss changes.
- Avoid placing gates or weld lines in the middle of the glossy window.
- Define the texture boundary in CAD as a separate face or a clear 2D drawing, not just a note.
- Confirm material compatibility between shot 1 and shot 2 (chemical bonding vs mechanical interlock).
- Ask for texture samples or plaques before final approval of large cosmetic areas.
- Plan for T1 texture trial: many shops texture after the first sampling confirms dimensions, so geometry changes don’t destroy a finished pattern.
Common defects and their usual causes
| Defect | Typical cause |
|---|---|
| Drag marks / scuffing on texture | Insufficient draft for texture depth, ejection imbalance |
| Flash at 2K interface | Texture too close to shutoff, worn or poorly fitted shutoff steel |
| Gloss variation on window | Mold temperature differences, flow lines, venting |
| Texture looks “washed out” | Low mold temperature or pressure, poor replication of fine detail |
| Sink behind glossy area | Thick sections, ribs or bosses behind the cosmetic face |
| Poor bond between shots | Incompatible materials, cold first shot, contaminated surface |
Most of these are cheaper to prevent in design than to fix in steel.
What to send us for a quote
To quote a 2K mold with laser texture accurately, please send:
- 3D CAD (STEP/IGES) for both shots, or the assembly with shots identified
- 2D drawing with critical dimensions and cosmetic surfaces marked
- Material for shot 1 and shot 2 (grade if known) and colors
- Texture requirement: pattern reference, depth or standard (VDI/MT/laser file), gloss areas and grade
- Annual volume and target cavitation
- Target market and any compliance needs (e.g. RoHS, REACH, FDA)
Get a DFM review before you cut steel
If you are planning a two-shot part with laser texture, a DFM review is the fastest way to catch shutoff, draft and cosmetic risks early. Our paid DFM review is available in three levels ($195, $595 and from $1,250), and the fee is credited against your mold if you order within 10 business weeks.
Send us your CAD and texture requirements, and our engineering team will review them with 2K tooling in mind.